Month: March 2021

5 Reasons Why Quality Of HDD Drill Bits Matters

5 Reasons Why Quality Of HDD Drill Bits Matters

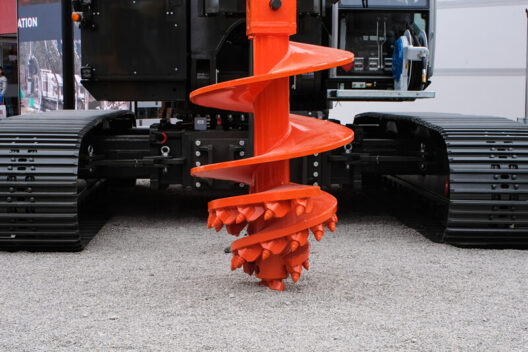
Horizontal directional drilling, popularly referred to as HDD, is one of the most widely used drilling techniques. It is mostly used for making tunnels to install water pipes, electrical cable and so on. But one thing that you must get right when it comes to HDD is the kind of drilling bits that you are using.

There are many reasons why the issue of quality matters when it comes to HDD drill bits. In this guide, we are going to look at 5 of the main advantages that come with investing in quality HDD drill bits. Check out the following:

  1. Cutting Performance

One of the major reasons why you need to consider the issue of quality is cutting performance. For the drilling of these lines for underground installation, you need to have drilling bits that cut swiftly to ensure faster drilling. This is only possible if you invest in drilling bits that cut swiftly. In other words, you need high-quality bits for the machine to deliver maximum performance.

  1. Faster Drilling

If you are in the business, the speed of handling any task is very crucial. You need to handle tasks very fast if you want to get the most out of your investment. For the drilling machine to finish the tasks fast, you need to consider investing in quality HDD drill bits. This is the only way that you will be able to get the most out of the machine.

  1. Managing Running Cost

The quality of bits greatly determines the cost of running the HDD drilling equipment. A good example is the amount of money that you spend on fuel when working. The other example is the cost of maintaining the machine and its parts. With quality HDD drill bits, all these costs are significantly reduced.

  1. Reduced Need For Maintenance

The need for maintaining the machine often is significantly reduced with quality HDD drill bits. With quality drilling bits, the rate of wear and tear is significantly reduced. That’s how the need for maintenance is reduced, and this will save you money in the long run.

  1. Longevity

Tools’ durability is greatly determined by the quality of tools. If you want your HDD drill bits to last longer, then you need to consider investing in good quality. That’s another reason why you need to critically check the issue of quality.

This Is How To Replace Rayco Stump Grinder Teeth

This Is How To Replace Rayco Stump Grinder Teeth

Are you planning to replace your Rayco stump grinder teeth? Well, you do not have to hire a professional to do this for you. If you have time and the basic tools supplied with the machine, you can do it yourself. In this guide, we are providing you with some of the steps you should follow to replace Rayco stump grinder teeth.

Step 1: Remove Spark Plug

The first step should be about safety. The stump grinder wheel is one of the most dangerous parts of the machine. Make sure that you have removed the spark plug and keep it in the pocket. This is to ensure no one will start the machine while you are working on it. This is very important for your safety.

Step 2: Prepare Work Surface

Make sure that you have everything set for the replacement work. One of the things you need to do is cleaning the area you intend to use for the replacement. If it is the garage, make sure have clean it to enable you to locate even the smallest nuts and bolts. Preparing the work surface also helps make the work easier and improves your safety.

Step 3: Remove old Teeth

With the right tools, start removing the old Rayco stump grinder teeth. This should not be difficult to do if you had cleaned the wheel thoroughly to remove buildups on the teeth. To make the process easy, make it methodical to avoid losing track of things. Remember, the replacement is the reverse of the removal process. So, you need to be very keen.

Step 4: Clean Teeth Cavity

Once you have all the old teeth removed, you need to clean the wheel. Remove all the buildups in the cavities, including any form of rust. This should not be difficult because you can use cleaning detergents and a rug or piece of cloth. Machine oil can also be used to clean cavities.

Step 5: Install New Teeth

Using the same tools used for removing old teeth, start installing new Rayco stump grinder teeth. This should not be a difficult thing, consider you had removed the old ones. Set the teeth in the cavity and tighten the set of screws. Ensure the teeth is tight, and it’s not moving.

Step 6: Test The Teeth

Install the spark plug and start your Rayco stump grinder. Test whether the teeth were properly install by grinding a stump. If they are still tight and not moving, the machine is ready for work.